Home audio-visual installation is a complex process that requires careful planning and execution to get it right. When it comes to setting up a home audio-visual system, many people are unsure where to start, and that’s completely understandable.
Setting up a home audio-visual installation sounds like a techie’s dream, but it’s a puzzle for many. Where do you start? What’s the difference between HDMI and optical cables? How do you get your system to look clean and work seamlessly?
Good news: You don’t need to be a pro to figure it out.
A well-planned home audio-visual installation can transform your space into an entertainment hub. Whether you’re watching a movie, gaming, or just enjoying music, the right setup makes all the difference.
Why Set Up Your Own Home Audio-Visual System?
- Save money. Hiring a pro isn’t cheap.
- Customize your setup. You know your space better than anyone else.
- Learn a new skill. It’s easier than you think, and it’s fun.
To get started with your home audio-visual installation, you’ll need to gather the necessary equipment, including a TV or projector, sound system, and any additional components such as a Blu-ray player or gaming console.
It’s also important to consider the type of connectivity you’ll need, such as HDMI or wireless connectivity.
But first, you’ll need the right tools and gear.
Tools You Need for a Home Audio-Visual Installation
Choosing the right equipment for your home audio-visual system can be overwhelming, with so many options available on the market.
When it comes to selecting a TV or projector, you’ll need to consider the size of the room, the type of content you’ll be watching, and your budget.
You’ll also need to think about the type of sound system you’ll need, including the number of speakers and the type of amplifier.
It’s a good idea to do some research and read reviews to find the best equipment for your needs and budget.
Before you start, gather these essentials:
- TV or projector: The centerpiece of your setup.
- Speakers: Soundbars, bookshelf speakers, or full surround sound.
- Receiver: The brain that connects it all.
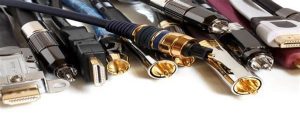
- Cables: HDMI, optical, speaker wires, and power cords.
- Wall mounts and brackets: For TVs and speakers.
- Surge protector: Protect your gear from power spikes.
- Basic tools: Screwdriver, stud finder, level, cable ties.
Once you have the gear, it’s time to map it out.

Step 1: Plan Your Layout
The first step in any home audio-visual installation is to assess your space and determine what kind of system you need.
This involves considering the size of the room, the type of content you’ll be watching or listening to, and the number of people who will be using the system.
According to experts in the field, a well-designed home audio-visual system can make all the difference in creating an immersive and engaging experience.
Here’s what to consider:
- Viewing distance: Place the screen 1.5 to 2.5 times the screen’s diagonal size away from seating.
- Speaker placement: For surround sound, position speakers at ear level. Rear speakers should sit slightly behind the audience.
- Cable routing: Will cables run through walls, under carpets, or be hidden with cable channels?
- Power outlets: Ensure enough outlets for all your gear.
Pro Tip: Draw a quick sketch of your room and mark where each component will go. This makes installation smoother.
Installing your home audio-visual system can be a complex process, and it’s essential to get it right to ensure you get the best possible picture and sound quality.
This involves connecting all the equipment together, including the TV or projector, sound system, and any additional components.
You’ll need to make sure all the cables are securely connected and that the system is properly configured.
It’s a good idea to consult the user manual for each piece of equipment to ensure you’re connecting everything correctly.
Step 2: Install Your TV or Projector
- Wall Mounting a TV: Use a stud finder to locate wall studs. Mount the bracket, then attach the TV securely.
- Setting Up a Projector: Mount it on the ceiling or place it on a stable surface. Ensure the projector aligns with the screen.
- Screen Setup: Use a level to hang the screen perfectly straight.
For more information on installing your TV read: TV Wall Mounting Questions and Answers for DIY Enthusiast
Step 3: Connect Your Audio System
Great sound takes your setup to the next level. Here’s how to get it right:
- Position Speakers: Follow your plan. Keep distances equal where possible for balanced sound.
- Connect the Receiver: Plug speakers into the correct ports on the receiver.
- Run Cables: Use cable ties or conduits to keep wires neat.
- Test the System: Play audio to ensure all speakers work properly.
If you’re setting up a soundbar, it’s much simpler. Connect it directly to your TV using HDMI ARC or optical cables.
Read the complete guide on Home Theater Sound Systems: Ultimate Guide to Installation
Step 4: Configure Your Devices
With everything connected, it’s time to configure settings.
- TV Settings: Adjust brightness, contrast, and resolution for your room’s lighting.
- Receiver Settings: Use the calibration mic to fine-tune the audio.
- Streaming Devices: Connect to Wi-Fi and sign in to apps.
- Game Consoles: Enable 4K or HDR features in the settings menu.
Pro Tip: Update firmware for all your devices to ensure optimal performance.
Step 5: Hide Cables and Tidy Up
A clean look is essential for a professional setup.
- Cable Channels: Mount these along walls to hide wires.
- Zip Ties: Bundle cables to reduce clutter.
- Wall Plates: Use these to route wires into walls for a seamless finish.
- Furniture Placement: Use TV stands or media cabinets to hide components.
Step 6: Test Everything
Now, the fun part: testing!
- Play a movie to check video quality.
- Stream music to test audio clarity.
- Switch between inputs to ensure smooth transitions.
- Adjust settings as needed until it’s perfect.
Setting Up Your Home Audio-Visual System
Once you’ve installed your home audio-visual system, you’ll need to set it up and configure it to your preferences.
This involves adjusting the picture and sound settings, as well as setting up any additional features such as wireless connectivity.
You’ll also need to make sure all the equipment is properly calibrated to ensure you get the best possible picture and sound quality.
Some popular settings to adjust include:
- Picture mode: This allows you to adjust the picture settings to your preferences, including brightness, contrast, and color.
- Sound mode: This allows you to adjust the sound settings to your preferences, including bass and treble.
- Wireless connectivity: This allows you to connect your equipment wirelessly, making it easier to stream content from your devices.
Troubleshooting Common Issues
Even with the best planning and installation, issues can still arise with your home audio-visual system. Some common issues include:
- Poor picture quality: This can be caused by a number of factors, including poor lighting, incorrect TV settings, or a faulty connection.
- No sound: This can be caused by a faulty connection, incorrect settings, or a problem with the sound system.
- Interference: This can be caused by other electronic devices in the room, such as cordless phones or microwaves. To troubleshoot these issues, it’s essential to check all the connections and settings, and consult the user manual for each piece of equipment.

FAQs Home Audio-Visual Installation
Q: How much does a home audio-visual installation cost?
Costs vary widely. DIY setups range from $500 to $5,000, depending on your gear.
Q: What’s the best cable for audio?
HDMI is ideal for most setups, but optical cables work well for audio-only connections.
Q: Do I need a professional installer?
Not usually. With the right tools and patience, most people can handle it themselves.
Q: Can I use wireless speakers?
Yes! Many modern systems offer wireless options for easy setup.
To Wrap It Up
Planning and designing your home audio-visual system is crucial to getting it right. This involves considering the layout of the room, the type of content you’ll be watching or listening to, and the number of people who will be using the system.
You’ll also need to think about the type of equipment you’ll need, including the TV or projector, sound system, and any additional components.
It’s a good idea to create a floor plan of the room and mark out where you’ll be placing each piece of equipment.
You should also consider the lighting in the room, as this can affect the picture quality of your TV or projector.
Now you’re ready to create a seamless system that’s both functional and stunning. Happy installing!
Home Wiring Pro offers online resources and guides for homeowners looking to enhance their homes through TV wall mounting, installation of home speaker systems, and home automation. Learn the most effective techniques for wiring your projects. For more information about our services visit our social post on Facebook, or Instagram.